Sew a Fleece Pocket Diaper with Traditional Back Opening
Pattern: Very Basic All in One Pattern
I'm using a layer of heavy weight Windpro fleece for the outer and a layer of white microfleece for the inner. You could easily subsitute the Windpro for PUL.
Step One: Cut your outer layer using the pattern extension lines and the inner layer using the solid inside cut lines (through the leg area). The only change you are going to make is to cut a 1″ flap from elastic anchor point to elastic anchor point on the back waist. (See photo).

Step Two: Sew the strip of Aplix loop to the front panel of the outer layer only. I almost forgot and started sewing the microfleece layer to the outer layer.

Step Three: With right sides together, straight stitch around the edge starting at the end of one back wing and ending at the other wing. Do NOT sew along the back waist just yet.
See how the outer layer is just a smidge baggy around the legs? This will help the outer fleece roll in.

Step Four: Sew the elastic in the leg areas as directed. Stretch while sewing to the outer fleece side using a zig zag stitch.

Step Five: Next, you're going to add elastic to the special 'flaps' you cut along the back waist. Stretch the elastic gently as you sew it to the wrong side of the Windpro and Microfleece layers.

Here you can see the elastic sewn onto the flap of the Windpro side. Repeat on the microfleece side.

Step Six: Now fold the flaps down, hiding the elastic inside and stitch the flap down. This creates a casing, hiding the elastic. Don't worry about the edges of the fleece (or PUL if you are using a PUL outer), they won't fray. I just used a straight stitch here. Repeat on the other side.

Here you can see the elastic in the pocket opening is all hidden. We now need to close the wings of the back waist.

Step Seven: Using a straight stitch, sew the wings shut. When you get to the pocket opening, sink your needle and pivot, sewing straight off the diaper. Backstitch several times to secure.

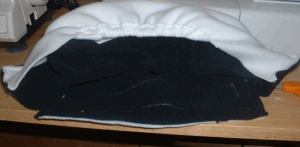
This photo shows steps two through seven are complete. Trim the corners and turn it right side out.

Here is the pocket diaper turned right side out. Check your front Aplix panel. If it looks crooked, turn the diaper inside out again and sew the front panel to match it so everything lines up. Or just leave it crooked.

Step Eight: You can leave your diaper as it is, or for a neat look, topstitch all around. Start at one corner of the pocket opening. Line your presser foot up with the edge of the diaper. Move your needle over if your machine will let you, to get the stitching as close to the edge as you can. Make sure your corners are turned out sharply and topstitch all around. You can use a decorative stitch if you'd like. Just be sure to go around the elastic in the leg areas.

Step Nine: Sew your hook tabs to the wings as directed in the pattern. You can sew the optional crossover loop tab on as well.

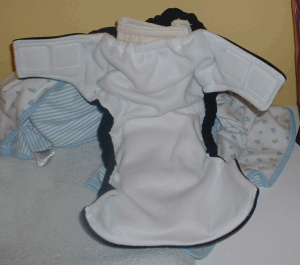
All Done! It's hard to see the navy fleece in the photo. This kind of diaper will attract lint in the wash, so wash it with other fleece items if the lint bothers you.

You can stuff the pocket with as much absorbency as your baby needs. This photo shows it stuffed with a chinese prefold diaper folded into thirds.


